Like a lot of others, I’m not much of a big game hunter but enjoy the 365 days a year open season on out of state hogs and coyotes here in Utah. There are a lot of coyotes here and my usual SOP is to throw my Seekins 6.5 Creedmoor semi or Desert Tech SRSA1 in a pack and head out. I’ll go to an area where previous sign has been present and I can get some longer range shots.
It’s not uncommon for me to set up at 300+ yards so as not to be seen. Less than efficient compared to baiting or calling for sure, but for me, it’s more about the whole experience: hiking in the snow, setting up, ranging an area, then settling in and enjoying the countryside. It provides hunting and tracking practice at a nice working distance. Being able to stay on the target, range, and then hold is a huge advantage making a rifle mounted range finder quite nice.
A few rifle mounted range finders are available today, but most are way out of my budget. Some of the smallest, lightest, and most popular units start around three grand and can double that. Many use lasers (both visible and IR) which is kind of cool. Infrared lasers are a game changer, but they require another three grand for NV, twice that for the most current dual units. Clip on sights that fit in front of the rifle may be better, but now you are talking closer to ten grand. Just not something that will happen soon for me. Something more reasonable would be nice.
Fortunately, Silencerco Weapons Research (SWR) built the Radius. Priced at a grand it is reachable and should provide some advantage for those who hunt or shoot like me.
Silencerco Weapons Research Radius
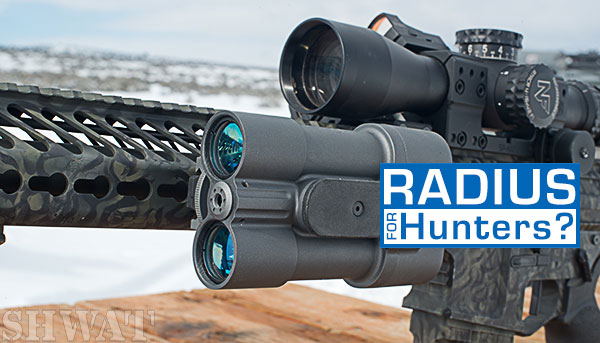
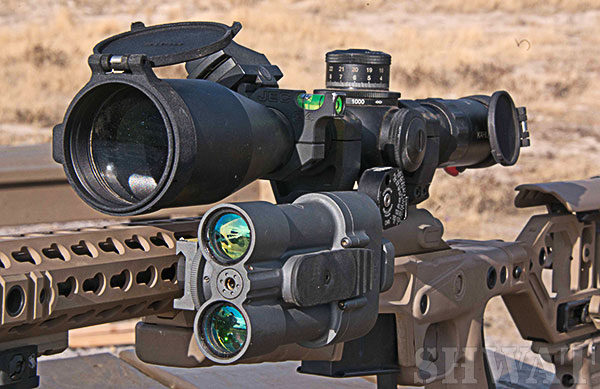
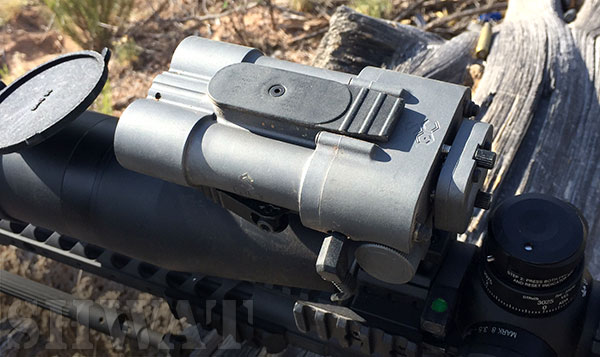
The Radius is primarily a weapons mounted range finder designed to attach to a rail on your hand guard, scope mount, or other solid area on the rifle. It can also be mounted to a spotting scope that is equipped with a rail. About the size of most hand held rangefinders it weighs in at 18.2 ounces, batteries installed. Heavy by comparison, it is needs to handle recoil and be adjustable. Maximum range is listed as 3200 yards with a general range of 20 yards to a mile under favorable conditions.
It is waterproof, durable, and designed to deal with rifle recoil. Powered by two CR123A batteries, it can range continuously for 12 hours. Batteries lasted several months with moderate use.
The easy-to-read screen indicates battery life and provides three ranges, the primary (strongest) and two secondary ranges. As a rule it displays your target range, one closer and one farther, but it is all about signal reflection strength, not necessarily position.
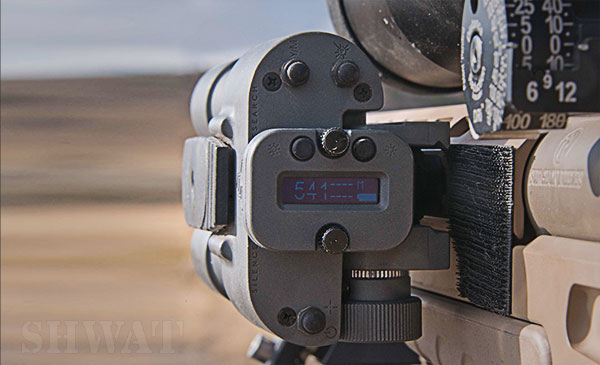
Loosen two captured screws and you can rotate the screen 360 degrees to accommodate various mounting positions. Screen brightness is adjusted with buttons on either side of the screen. The power button is also used to acquire the range. Power up, then press it once for a static range. Press twice quickly and it ranges continuously so that as you move from target to target it provides the correct ranges. There is a visible laser used to zero it to your scope or rifle, and a button that moves between yards and meters.
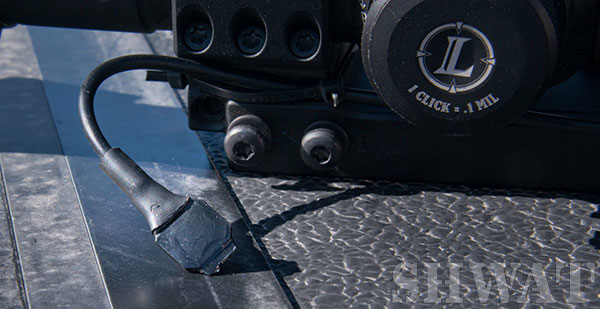
For remote applications there is a plug-in wire and pressure switch. Run the switch to somewhere near your control hand and you can operate the Radius without coming out of the scope.
So why weapons / optic mounted?
The first question asked when the Radius is mounted is “why”? Most want to know if it is any better than a hand-held or binoculars. Like most things, it depends.
At close range on large targets or in perfect conditions probably not. But anyone trying to get settled on a small target like a coyote at 300-400 yards can attest to how difficult that can be, especially if it is moving. Holding the range finder steady is not all that easy and harder still in inclement weather. Most hunters try to find something to steady the rangefinder on. Mounted to your rifle or scope all but eliminates that issue. Your rangefinder is as solid as your position. It is much easier to get steady; the longer the range, the bigger the difference this makes.
With the scope on zero the range is accurate no matter the power setting so you can zoom in to identify your target and range at the same time; which brings us to its next advantage – speed. Generally you range first, add elevation if you are turning knobs, find the animal in your scope, hold over if needed and press. That is, if the target is still there. With a rifle/optic mounted rangefinder you do it all from the scope. Observe, locate in the scope, press the button (or pressure pad) to get range, hold if you can, dial if you must, then press the shot, all while staying on target. It is much faster and makes it less likely you will lose your target while moving back and forth between devices.
Lastly is convenience. Add a Kestrel weather meter to your pack or rifle carrier and you have all you need to get on target in any environment. If you are on home ground and know your holds you have everything you need on the rifle. Some add holds to the scope cap, rifle, or a card, but so long as the atmospheric conditions are known and tested you may not even need the Kestrel. Spot using your rifle, get your range, hold or turn knobs, press when appropriate. No need to get anything out of the bag or pack. If the animal is moving just move with it and the rangefinder keeps you updated on any significant change in range. Pretty slick, simple, and convenient.
Mounting the Radius
Over the course of the last year or so my Radius has been mounted to three primary rifles and a few others during tests. First, you need to decide how you want to mount it, then zero it, then confirm on some known range targets. Once that is done you can generally remove and replace on the same rifle in the same position with little change, or at least I was able to. Move to a different rifle or mounting position and you have to start over.
Zeroing is pretty easy and the package includes a target you can use to properly set it up. Along with a target you get some reflective tape so you can see the laser. My Radius was zeroed using these items along with targets at various ranges. The most important part to remember is you are matching the rangefinder to the scope and barrel with no elevation in the scope, or at zero. It means you range before you add elevation to your scope. Think of it as working in tandem with your scope and rifle.
Before you mount the Radius, make sure your scope and rifle are zeroed and your knobs are bottomed out (on zero). Measure the distance from the center of your optic to the center of the barrel and write it down. Measure from where the laser emits (between two tubes in the center) to the barrel center and write that down. Hold your crosshairs on the center of the target. Using your optic-to-barrel measurement (down from the center) put a big X where it corresponds on the target. Using the barrel-to-laser measurement, move from that X to the left or right and put the red reflective dot in place. Set the target up anywhere from 20-100 yards and hold center with the scope. Turn on the laser and walk it into the reflective dot using the adjustment knobs on the mount. Once there you are lined up. Head out to the range if you are not already there and confirm on known distance targets. I always find there is a need for some fine tuning especially with side mounting. Mounted to the top of your scope, you only need the scope to center of the laser measurement, not side to side.
Testing
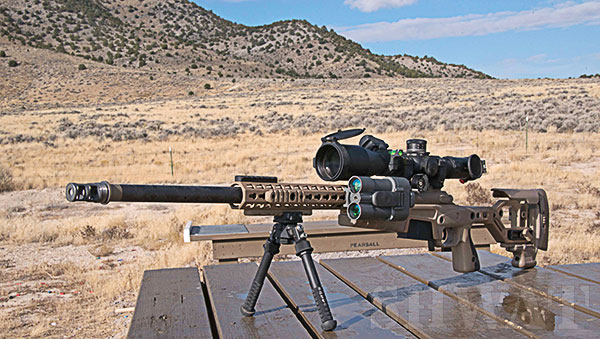
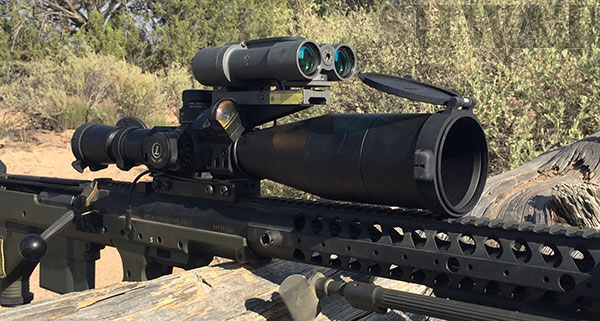
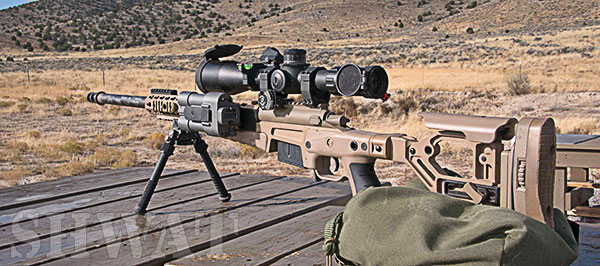
Out of the box the Radius was attached to the left side of my Seekins SP-10 using a 6.5 Creedmoor Proof Research barrel. It is my “go to” packing in hunting rifle. For testing, the remote switch was not used. Using the supplied target it was zeroed in the shop, then taken to the range and confirmed at 100 through 600 yards on 12-16” steel targets. Mounted so it could be reached without coming out of position, it was possible to see the range while checking my level, never having to come off scope. It was thrown in my Eberlestock X3 LoDrag pack and carried up the mountain. The first thing I noticed was it took some work to get it into the pack; it fit, but was anything but smooth. Once set up, some usual spots were ranged with the Radius; then confirmed with my Leica range finder. As zeroed it was dead out to 600 yards; after that it took a bit of adjustment with elevation. After a while there was a happy spot where I could get on game sized targets out to 1000 yards with great consistency. As dusk fell it was ranging even farther to 1500 yards and beyond. No coyotes popped up, so some rocks were engaged to see if it held up under fire, and there were no issues.
Its next rifle was my Desert Tech SRS A1 where it stayed for months. This rifle uses a SPHUR mount so their dedicated rail was added. It was the easiest to zero and most consistent position for ranging. Over the course of several months and a couple media trips it ranged to targets out to a mile at dusk, and 1200 yards in less reflective conditions.
Attaching the remote switch made it easier yet. Part of a test using the Leupold Mark 8 with a David Tubb DTR reticle, it turned the SRS into a range, aim, check level, hold and ring steel event. First round hits were accomplished from 300-1000 yards using the Radius, with a few shots far beyond.
The SRS was removed from the bag, set up, the target located, ranged, held for wind and bang. Using the yardage markers and wind flags in the DTR meant no math so long as the bullet/round matched the reticle. It was about as slick as it gets. Again, the only real issue was the Eberlestock wasn’t usable with the Radius attached. It did fit in the Desert Tech bag, but was tight. That mounting position did not really interfere with anything but just felt bulky so I moved the Radius to the side of the SPHUR mount. Mounted here, the range finder interfered less felt better from prone and fit in the Eberlestock G4. This setup remains my favorite and the one it will stay in for the most part.
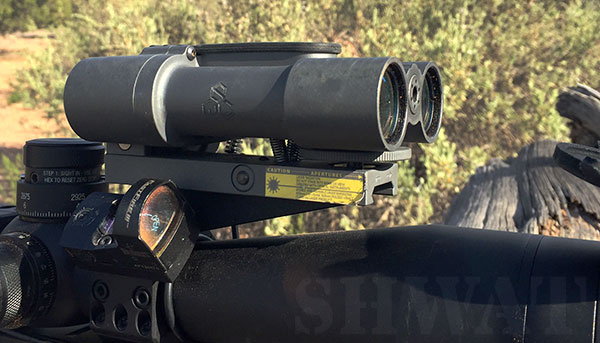
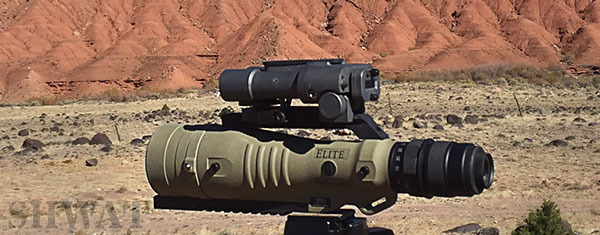
My last test involved my Surgeon Scalpel rifle along with a Bushnell Elite Tactical LMS 8-40 x 60mm spotting scope. Equipped with rails for both night vision and a range finder I attached the Radius to the top. I was headed out to assist with a TNVC Night Fighter Scoped Carbine class with Buck Doyle of Follow Through Consulting. This class provided an excellent test of the Radius.
Designed around the use of the TreMoR reticles and scoped carbines, Buck has 12” steel at known distances from 350 -1100 meters. The Radius was attached to the Bushnell and zeroed on the 381 meter target. Each steel target was ranged and marked into a range card. Using Federal Gold Medal Match 142 grain SMK, the Surgeon was checked for zero and loaded up. Each range was matched to a hold calculated using the Kestrel and placed next to it on the card. The shots should be dead on if the Radius is accurate.
This rifle holds under .75 MOA out to 1000 yards with this ammunition. Shooting from prone, each target was engaged using the range and hold provided by the Radius and Kestrel. Every target was hit on the first round with the exception of the 1100 meter steel; it took two. No knobs, just holds, mostly top or bottom of steel, all hits. Pretty impressive for sure, and a good day for me. To confirm completely each steel was ranged again using a Vectronics Vector IV, a $13,000 range finder. The thousand dollar Radius was within 5 meters or less of every target. Pretty sweet.
Considerations
Mounted to the SPHUR mount whether on the side or top allowed me to remove and attach the Radius without altering the zero. It was easily the most solid and consistent mounting setup. It was even moved to a different rifle and was still on. Doing so on the side of the rifle was more problematic. Most of the time it was close enough to get good readings out to 600 yards; beyond that it needed a bit of adjustment. Not sure that matters to most, but just a consideration to be aware of.
Under moderate to ideal conditions it was possible to range to a mile and beyond at times. Otherwise it was pretty consistent for me out to 1200 yards. While shooting at that range is fun, it’s not something I’d contemplate as a hunting range. If ranges like that are your norm for hunting it is time to invest in one of several higher end range finders that will consistently perform that far out. For most people under most conditions the radius works as well or better than anything on the market near its price point.
This probably should not be your only rangefinder, it is just not always possible or prudent to range while pointing a rifle at things. A good set of binoculars with a range finder are still my primary choice. But, if you can afford to put a Radius on your rifle it can be a huge advantage.
Designed to be a reasonably priced rifle mounted range finder for the average hunter the Radius does well. It is not going to compete with tactically oriented devices at several times the price and was never intended to. But it brings the basic capability to a ton of people.
Well built, it could be smaller, but my guess is, like all things electronic, that will happen at some point. If you want to give a rifle mounted range finder a try then take a good look at the Radius. It gets the job done well without breaking the bank.