 Hunting rifles have evolved. It is to be expected. History proves that hunting firearms have always followed advances in military small arms technology. For many of us, our hunting rifles are no longer polished blue steel and high-grade walnut. We tend to gravitate to more modern materials and designs with our guns, so why stick with old-school finishing technology?
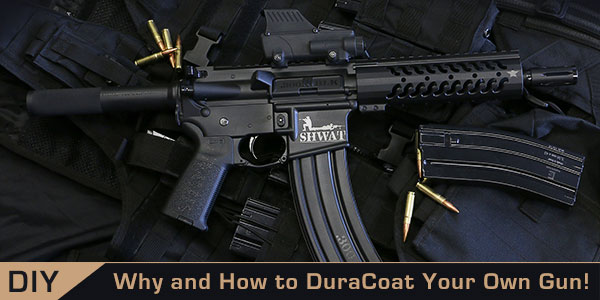
With simple tools and the right prep, you can easily apply a professional high-tech gun finish that rivals the quality of any professionally applied finish and far surpasses the durability and rust protection of any traditional finish. Here’s how:
1. Pick the right finish
Forget hardware store spray paint. Fortunately, the rattle can paint jobs aren’t as popular as they once were. Spray paint is not durable, hard to apply evenly, and the results almost invariably look poor. Durability is dismal, and common solvents quickly strip it, or worse, make it tacky.
Stick to a quality, purpose-made, firearms finish. They are not expensive and the results are far better. A real firearms finish will also be much easier to apply than canned spray paint. Three brands usually come to mind; Cerakote, DuraCoat, and KG Gun Kote. Any of the three will produce good-looking, durable results. In my experience, as far as the end user is concerned (as opposed to a lab test), durability will be similar between the three. Don’t be taken in by aggressive marketing; it is easy to believe that one of those three is far more durable than the others if you accept all the hype.
 For the home user or the professional, I recommend DuraCoat. DuraCoat is easy to apply, allows great flexibility in techniques to create stunning camo patterns and artwork, and best of all, it is a no-bake finish. Because it does not need baking, it can be applied to polymers, wood, and optical sights, without compromising the durability.
Believe me, the baked on finishes are not something you want to cook in your wife’s oven! They are highly toxic. For proper results, they require the right type of oven, and that GE kitchen appliance isn’t it. Toxins will release from the finish and adhere to the interior of the oven, later to adhere to your pork roast. Your family will not appreciate the smell or the flavor.
Duracoat can be ordered directly from Lauer Custom Weaponry in a myriad of colors, plus some really amazing effects like the DuraPearl and DuraBlue finishes. I have finished hundreds of firearms in complex camo patterns or bright colors, but for the project I chose for this article, I used only two products; DuraCoat Matte Black and Gloss DuraClear clear coat.
2. Choose a firearm to be coated
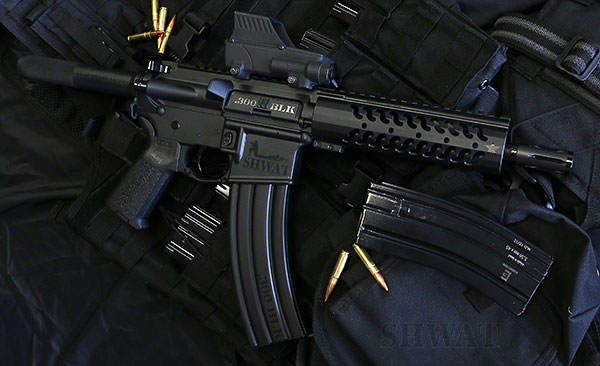
For this project, I had a CMMG MK4 AR Pistol in .300 Blackout. When dealing with very short barreled ARs and the .300 BLK cartridge, it can be tricky to get reliable function. For that reason I am glad that I chose to go with CMMG. Quality is high and the pistol has proven to cycle both subsonic and supersonic loads flawlessly.
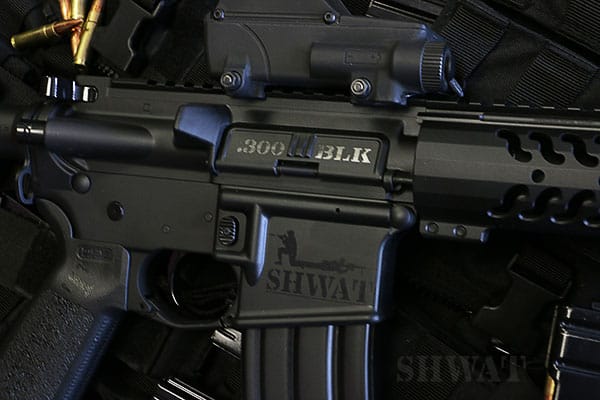
When I purchased the pistol, I noticed the serial number began with SWT. “I got a SHWAT™ serial number!” I thought. An SWT serial number on a Blackout firearm – that deserved a Blackout finish and a SHWAT™ theme.
I usually try to start with polymer parts that are as close to the finished color of the DuraCoat as possible. Even if the DuraCoat color is the same as the color of the polymer parts, I still coat the polymer parts. This ensures an exact color match and an even sheen. On this firearm I did not coat the Shockwave Blade arm brace. While I think that this brace completes the pistol nicely, and is one of the more attractive and functional braces, I plan to install a Gear Head Works Tailhook brace as soon as I get it in.
3. Gather equipment and supplies
You need supplies to prep, and supplies to coat.
For prepping, you need a solvent that will remove all oils and then evaporate, leaving the surface dry and clean. Oily solvents don’t work. Neither do solvents that leave solids behind. You may use a solvent like a lacquer thinner, available at most grocery or hardware stores, or brake cleaner. Be careful what solvents you use on optical sights or any part of the firearm that contains rubber or polymer. Mineral spirits can work better for polymer parts.
 You may need something to prep the surface. A good parkerized or rougher anodized surface needs no prep other than degreasing, and you certainly do not want to remove either type of finish if it can be avoided.
I blast non-parkerized surfaces (or rusted parkerized metal) with 100 grit aluminum oxide. If you have access to a blast cabinet, this is ideal. Do not blast with glass bead. If you have no cabinet, you can still get a cheap sandblast gun and blast outside. This is gritty work, so be sure to use proper protective equipment.
If you can’t blast, you can prep by hand with fine emory cloth or even a scrub pad. Be careful not to use anything coarse enough to really leave scratches. DuraCoat shows fine detail, and scratches will show.
I purchase good blue painter’s masking tape to use for covering anything I don’t want to coat. Keep the tape clean, because any debris that gets stuck to its edges will remain in the finish.
For coating, you need something to spray the finish. This can range from a cheap plastic Testor’s model airbrush and a couple cans of compressed air to the most expensive professional airbrush or fine HVLP spray gun. I use quality Iwata airbrushes, but they are not inexpensive. While in Iraq I had good results coating a firearm using a plastic Testor’s airbrush and canned air. Place the canned air in a bowl of warm water while working to keep the can from forming ice and dropping its air pressure.
You can purchase several types of applicators from Lauer along with the DuraCoat, such as a decent, inexpensive airbrush. The compressor that you have in your garage can easily be fitted to accept the airbrush. You can use canned air, or even use a spare tire as a compressed air source. Whatever you choose, you can buy an airbrush and multi-use compressor for less than the cost of having a professional coater finish your gun.
If you prefer not to set up an airbrush or HVLP, check out Lauer’s DuraCoat Aerosols. These contain both DuraCoat and hardener in a spray can with a nozzle that allows much greater control over the spray than normal aerosol nozzles allow. I have to say it is the nicest aerosol product I have ever used.
If you are creating a pattern, text, or artwork, you may cut templates by hand or by ripping tape. You can buy templates, or have someone cut them for you professionally. Make sure vinyl templates are made from a vinyl such as Bren’s V-Mask that is intended for masking, not for permanent application, and that one that works around 3D shapes (gun parts).
Of course, you need DuraCoat in the proper colors, and I recommend a clear coat over most finishes, especially if multiple colors are used. An appropriate solvent for cleanup is required, and can be ordered with the DuraCoat.
You must use proper protective equipment when using these types of finishes. I use latex gloves (the solvents dissolve nitrile) and a breather. If you are coating outside with a good breeze, you might get away without using a breather, but I always wear one. Breathers are inexpensive. Your lungs are not. Use a filter rated for organic vapors. I use a particle filter above that to protect the more expensive vapor filter. Eye protection is essential.
4. Prepping the firearm.
I disassemble the firearm as far as is practical. Some people just coat a complete firearm, and that is fine, but I like to disassemble and make a professional job of it.
 After disassembly, use a solvent to remove all dirt, carbon, and oils from the surfaces. Soak parts in a tank of a good solvent, or blast the oils off with brake cleaner. Warm solvent and parts make quicker cleaning than cold parts or solvent. Optical sights need to be wiped down by hand.
Prep the surfaces that require it by blasting, sanding, or scrubbing. Blow dust off with air or brush off with a soft, clean paintbrush.
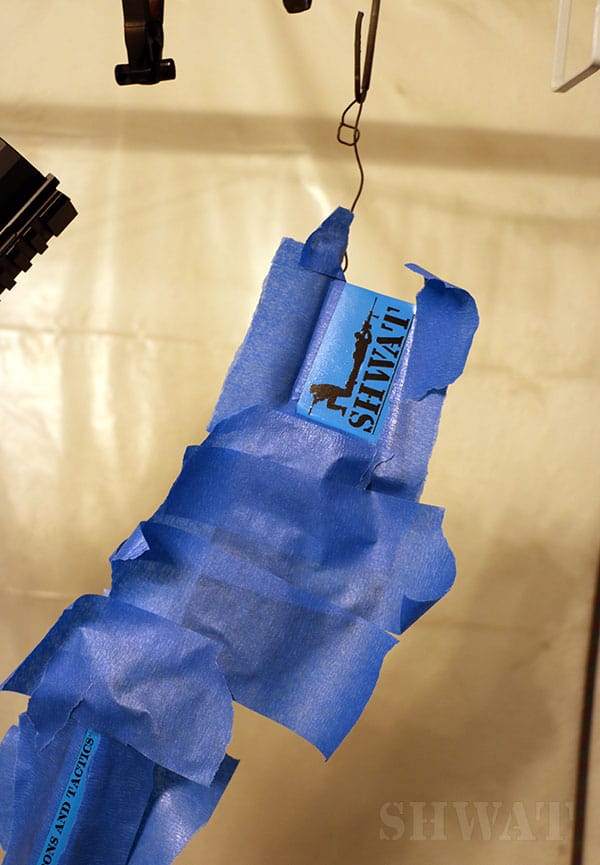
Mask any parts that should not be sprayed. I don’t coat engagement surfaces on trigger parts, the rails or barrels on tight pistols like 1911s, chambers, bores, bolt heads or lugs, etc. I mask all scope lenses, rubber parts like buttpads or scope eyepieces, if not removed, and scope markings.
Next, find a way to hang each part that will not interfere with coating or damage a newly coated finish.
5. Coating the firearm
Mix the finish according to the manufacturer’s directions, which are included with every bottle. Don’t mix too much or it will be wasted. A set of measuring spoons (but not your wife’s) can be used to measure the DuraCoat and hardener. I use metal spoons, because any solvent that cleans up DuraCoat will damage plastic.
Base Coat
Now, begin applying your first color. Coat the areas and angles of the parts that are most awkward first. If you also hit parts of the larger areas in the process, it is easier to coat those without over-applying the finish and causing runs. I first hit the inside of trigger guards, magazine wells, the inside corners of the fences and angles on an AR lower, the slots in a rail, etc. before coating the sides and flats.
Apply the finish in several light coats. Don’t try to hit it hard. Build it up in light coats to the desired thickness. The look and sheen of the surface can be changed by running the airbrush closer or farther from the surface. Some areas might need to be hit from multiple directions to coat all angles. Don’t get the airbrush too close to the surface or the coating will be too heavy and may run. Always keep your airbrush moving – it should be moving before you start the spray and still moving after the spray is stopped.
If the technique is correct, the finish will look like part of the surface, with all edges of markings sharp and every detail of the surface clear. If it looks like something applied on top of the metal, or if the sharp edges of markings look slightly rounded, the finish is being applied too heavily.
Parkerized surfaces may require several coats to fill the parkerizing to the surface, and then a few coats to finish.
Make sure you get good, complete, coverage on this first coat. You may wish to partially reassemble if you will be templating across several parts for subsequent colors.
Clean your equipment well, as once DuraCoat cures, it is extremely hard to remove. I once was interrupted while coating, and did not get back to my painting booth for almost a full day. I ordered a new airbrush as a result. Spray your solvent through your equipment to remove residual DuraCoat, before disassembling and wiping down the parts with a solvent-soaked cloth or paper towel.
Once the parts are finished, they should be allowed to cure for at least a couple hours before anything else is done. During this time you can mix another color and coat other parts if you are doing contrasting colors. For the finish on my SHWAT™ logo’d 300 Blackout, I coated all parts matte black, and let them hang and cure overnight. Then I took some measurements to design and cut some templates.
Templating
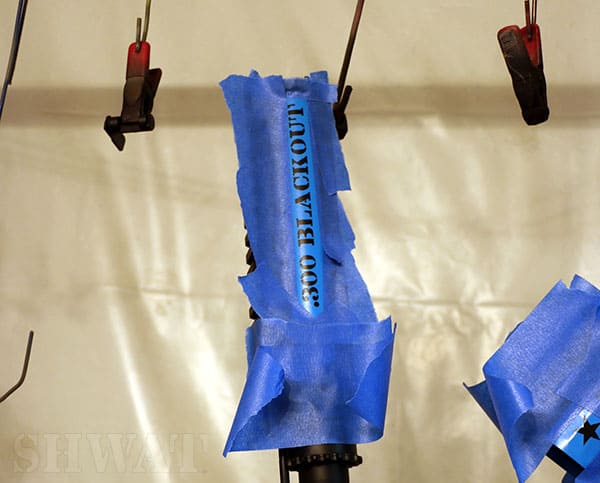
 Once the base coat has cured for at least a couple hours, you may begin applying templates. Template or mask the areas that you wish to remain the base color, and leave the non-templated areas exposed. If needed, fill in larger areas between templates with your masking tape. Make sure that all edges of the template are secured. If they lift, transitions between colors will not be sharp. If necessary to fit complex shapes, templates can be sliced with an Exacto or scissors, and then touched up with tape.
Because I used text and SHWAT™ logos, exact placement of templates was extremely critical.
Second Coat
When applying a second coat of a contrasting color, apply it just heavy enough to change the existing color, not to cover it up. It will look like there is not much contrast and that the base coat color is showing through. If you apply a heavy coat, you will fill in the templates and there will be a visible and tactile transition between colors. If it looks like your second coat is heavy enough, it is probably too heavy. When the templates are removed, the contrast between colors will be clear.
On this CMMG Mk4, I did not apply a contrasting color; I applied a contrasting sheen. The controls, already coated flat back like the rest of the pistol, are coated with a gloss clear coat. The logos and text that I have templated on the receivers, grip, and magazine also receive a coat of gloss clear. The result is a satin black AR with controls and artwork a gloss black. All black, but the contrast is in the amount of light reflected. Black on black, for the win!
Subsequent Coats
Additional coats are applied in the same way as the second coat. All coats need to be applied within seven days. Be careful not to fill in the first set of templates with the later coats.
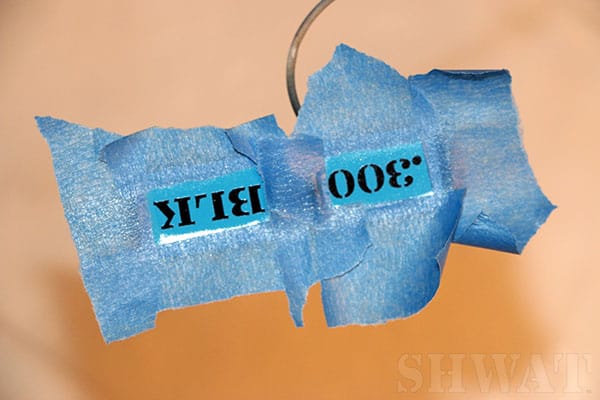
De-templating
Give your firearm time to cure after the final coat. I like to wait a day or so, as the templates leave less adhesive behind when I do so, but you can de-template after a couple hours if you can’t wait. The templates or tape will leave some adhesive behind. This cleans off easily with mineral spirits and a smooth, lint-free rag. An old Under Armour t-shirt is perfect. Any material soaked with mineral spirits may spontaneously combust, so don’t chuck the wet rag in your trash. Let it dry outside in a safe place, burn it, put it in a ziplock bag full of water, whatever. Just don’t put it in your gas dryer!
Clear Coat
Clear coats give the consistent sheen that you want, even the between colors. As with almost any paint or coating, some colors are shinier than others. Clear coating fixes this. For this project, I wanted different sheens so I took a different route.
The DuraCoat matte clear gives a very flat finish that has a really great look and feel. Mix it well and apply it in several very light coats. No clear coat on solid black results in a slightly satin finish that looks rich and smooth. Satin clear has a medium sheen and is not at all flat but not glossy, either. Gloss clear is glassy and smooth and shiny. Any time you use more than one color, use a clear topcoat. It will be worth your time.
 6. Reassembly
Duracoat can bond to itself if you reassemble too soon. Let it cure overnight, at least. The finish cures very quickly at first but the bulk of curing takes place in the first hours and then continues to cure over time, gaining its full hardness over several weeks. If I have time, I like to allow it to cure for a week before reassembly (making it less likely I will scratch the finish), but I generally end up reassembling after only day or two. Work carefully over an old towel instead of over a bare bench to protect your new finish. Zipper plastic bags work great for protecting finishes as you are working. If parts need oil or grease during assembly, apply these, as the firearm will be completely dry.
You may use your firearm right away, but run it gently for a couple weeks, if possible, to keep the finish nice until it reaches its full hardness.
 7. Take photos
Before you put it away, take some cool photos. For that matter, take some before you start for the “before and after” bragging rights! If you don’t have good indoor light, go outside. An overcast day will give you good light, or you can use the light just before or after sunrise or sunset, when there is no direct sunlight (this works only at more northern latitudes). A shaded area on a bright day can work, too.
Don’t be afraid to attempt a DuraCoat finish. Do be afraid of using the SHWAT™ trademarks! I got permission from the publisher before getting started. If you are unsure about committing to finishing your gun, first practice on a tool or something else you don’t highly value. DuraCoat is forgiving and easy to apply. It does not run readily. The majority of really well-done DuraCoat finishes that I see are done by shooters on their own firearms. Duracoat is amazingly durable, something I have proven over years of use in combat, training, and hunting.

Hello. Its my first time to use Duracoat. Im having issues on the paint using an airbrush with .05 needle. I noticed the paint leaves a dull and rough finish with small particles of paint. Im not sure whats causing this issue. I followed the paint-hardener-reducer ratio but got the same result. My air PSI is aroung 35psi but lower than that the airbruah wont spraybpaint as if its clogged up.
Thanks for the advice.
Mike
Are you getting blushing/dry spray? Do you get fine cobwebbing building up around corners? We see that in the winter here in Alaska, depending on outside temperatures and humidity, no matter what the temperature in painting booth. Also, some colors are more susceptible, red, for example. DuraCoat can also do that when it gets really old, but usually it is environmental. The solution is to add a few drops of DuraCoat retarder to your mix. What airbrush are you running?
Did you clear then entire project when done?? Even over the stencil’d areas of gloss?? I’m a bit confused on this part. I love how it turned out and want to replicate the practice.
Thanks!
I never knew that to coat a firearm you had to make sure it was dry and clean. My dad owns a rifle that I wanted to get coated for him to make it look brand new. This article made me realize I should have a professional coat it for me. https://mcmfirearms.com/solid-color-cerakote
With DuraCoat, it isn’t hard to do it yourself. It is a matter of taking the time to do the prep correctly, but the prep and coating itself is easy.
Great article mate very articulate. I have a marlin 336W 3030 which my understanding is ‘blued’ not ‘parkerized’. Would you suggest roughing up the blued metal parts or just spray on. I don’t have access to sandblasting, just wet & dry sand paper / grit. Any suggestions greatly appreciated. Cheers.